Phase 3
By digginfit
11 comments
For those of you interested this is the penultimate phase of my garden and design efforts.
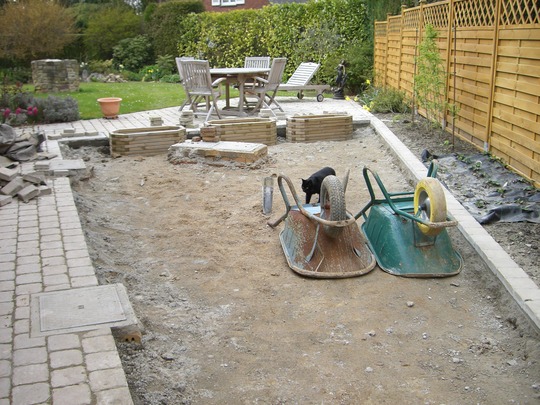
Whilst much of the paving around the house had been completed by the previous owners, we wanted an extra driveway so that we could get the cars off the road because we couldn’t get them into the garage. (The drive to the garage is too steep and both cars get ‘grounded’!) There was also an area just outside the back door which was just compacted gravel and kept flooding in heavy rain. All in all it was a mess.

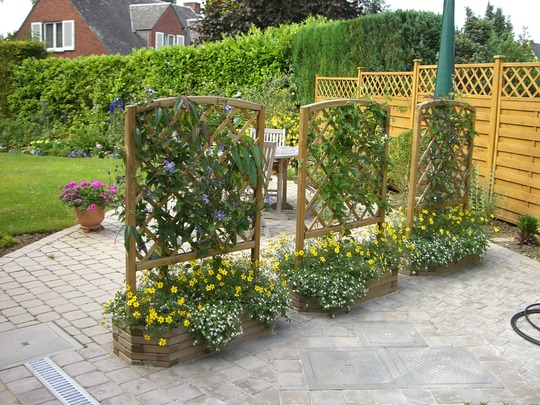
So in May 2008, while the driveway was being done we decided to have the back area paved at the same time and had the wooden planters that you can see set into the paving.
A few herbs, a blackcurrant, red currant and a gooseberry (which you can’t see).
Et voila.


During the autumn/winter of 2007 I found that a corner area of the garden flooded and being lazy didn’t want the hassle of putting in drainage channels or sumps! However I almost lost a couple of Hostas, so next best thing…
Dig it out, gravel it and make a feature.

A more close up view.

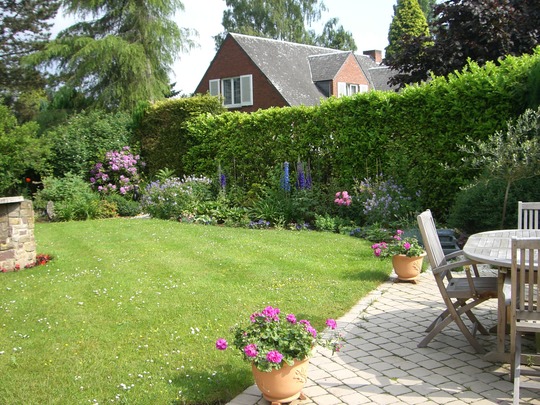
The previous owners had planted an Olive tree close to the seating area, but it was just planted in the lawn and we thought it looked a bit odd. So whilst I was creating the ‘flower fairy’ feature, I thought I’d have a go at a ‘Mediterranean’ area and include a water feature. However as we don’t have an electric supply going to the garden it had to be solar powered. Nevertheless, it works quite well and has a battery back- up system. Sadly in last winter’s -21 temps we lost the Olive but it has been replaced by an apple. Not very Mediterranean I know, but…

In the meantime, the eagle eyed amongst those of you following this will perhaps notice that the border has been enlarged a little and has gained a bit of a curve.
Second season of the border. (But I still hate that well!)

And a view of the side area where the old conifer hedge used to be. Unfortunately, the Rhododendron succumbed to a sudden and drastic illness and we were advised to remove it.

The final phase next time.
 7 Feb, 2011
 6 likes
Previous post: Nature in embroidery
Next post: Final Phase!
Comments
well done..looks really well thought out and using the best of the space
8 Feb, 2011
Love the planters creating a 'screen.' I may do something like that myself to cover the nasty orange gas bottle! Well done!
8 Feb, 2011
It looks really nice. You've done a lot of work and it has been worth it :o)
8 Feb, 2011
Looks lovely, well don!
8 Feb, 2011
wish i was sitting in that lovely garden right now!
8 Feb, 2011
I am very impressed. You have made a lovely garden, and I like the planters in the paved area too, with the trellis panels. Food for thought.....
8 Feb, 2011
Love the planters in the paved area, what a great idea.
8 Feb, 2011
Thank you all for your kind comments. At first I wasn't convinced the planters would work but I'm happy with them. I used planters with trellis panels to try and break the 'kitchen garden' from the formal garden. I'm pleased I did - although the climbers have got a bit out of hand now and need a good prune!
8 Feb, 2011
I think your planters with trellis panels are just wonderful! They do the job very effectively & give the garden a, open/enclosed area. Very well done!
12 Feb, 2011
Thank you Balcony.
12 Feb, 2011
Recent posts by digginfit
- Physocarpus opulifolius "Diablo"
7 Jun, 2016
- Happy New Year to Everyone
1 Jan, 2016
- A cautionary tale
5 Oct, 2015
- Tree Bumble Bee
15 Sep, 2015
- Garden today
18 May, 2015
- Shoes
1 May, 2015
Members who like this blog
-
Gardening with friends since
10 Sep, 2010 -
Gardening with friends since
4 Jul, 2008 -
Gardening with friends since
27 Oct, 2009 -
Gardening with friends since
1 Mar, 2008 -
Gardening with friends since
8 Aug, 2010 -
Gardening with friends since
4 Apr, 2009
it looks very pretty.
7 Feb, 2011